 FlavorAtlas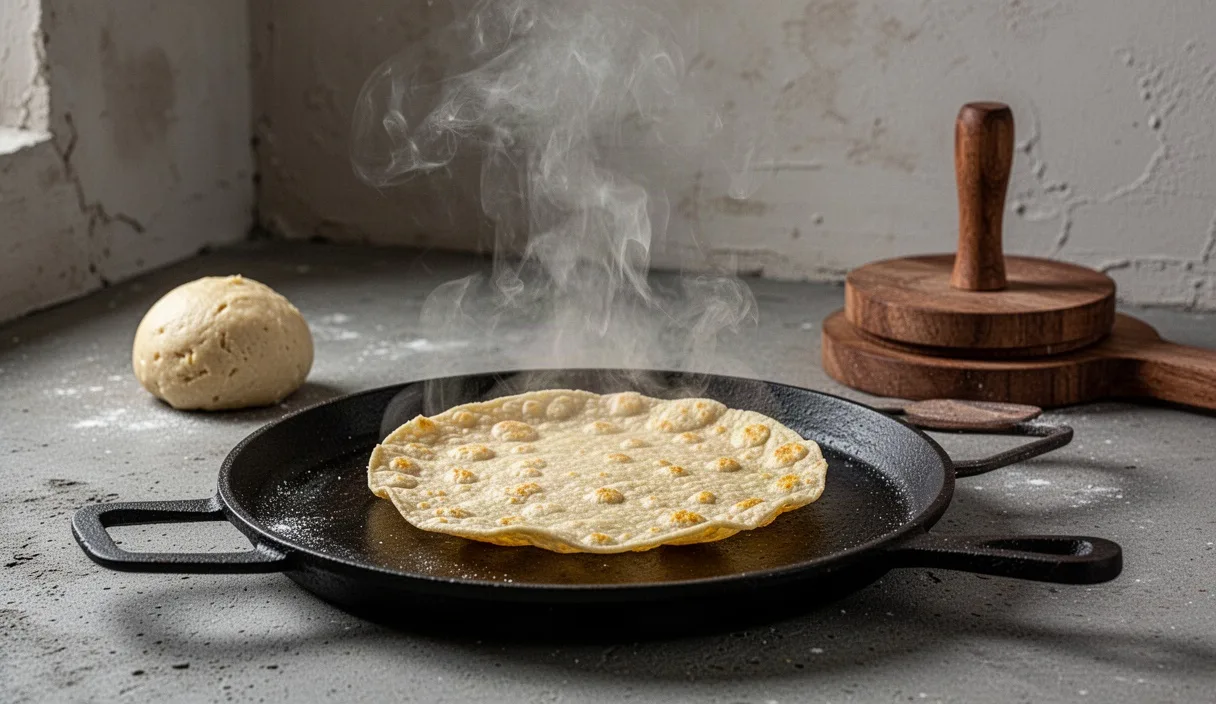
Real corn tortillas require nixtamalization. Without this ancient alkaline steeping process, ground field corn produces crumbly dough that will not hold together on a hot griddle. Steeping dried dent or flint maize in an alkaline solution, traditionally water mixed with slaked lime (calcium hydroxide), dissolves the tough outer pericarp of the kernel. This chemical bath frees bound niacin (vitamin B3), softens the hemicellulose in the cell walls, and alters the proteins so the corn can form a cohesive dough called masa. When dried and milled into a shelf-stable powder, it becomes masa harina.
A packaged corn tortilla from a standard grocery shelf rarely puffs. Industrial producers rely on acidifiers, gums, and preservatives to retain shelf life across several weeks, which densifies the crumb and locks moisture into place. Making fresh tortillas at home from dry masa harina reintroduces the authentic physical reaction: trapped interior steam expanding between two rapidly seared starch layers. Achieving that balloon-like inflation demands strict control over starch hydration, griddle surface temperature, and mechanical pressing.
Commercial masa brands versus heirloom varieties
Dry masa flour falls into two clear categories: mass-market commercial blends and single-origin heirloom varieties. Mass-market brands dominate grocery shelves. Maseca, produced by the industrial giant Gruma, is the baseline standard across the Americas. It uses commercially grown yellow or white hybrid corn, milled to a uniform, powdery consistency with added trace gums in some regional variations. Maseca absorbs water rapidly, produces a predictable dough, and yields a mild, slightly mineral corn flavor with a pale crumb. Bob's Red Mill produces an alternative commercial style that leaves a slightly larger particle size, offering more texture but requiring longer hydration times to avoid gritty, brittle edges.
Heirloom masa flours, popularized by importers like Masienda, source distinct Mexican landrace varieties such as Bolita, Chalqueño, and Cónico. These kernels carry deeply varied starch structures, higher natural oil content, and pigment ranging from deep blue to brick red and speckled cream. Heirloom varieties yield distinct, robust flavors, often grassy, nutty, or deeply earthy, because the corn grows in traditional milpa systems rather than monoculture plots. Their fat and protein profiles change how the flour drinks water. A blue Cónico flour demands significantly more liquid than an industrial white corn flour, and its coarser artisanal grind demands longer rest periods so the grain can absorb water to its core.
| Brand / Variety | Corn Source | Grind Size | Water Absorption Rate | Primary Use Case |
|---|---|---|---|---|
| Maseca White | Commercial hybrid white | Fine, talc-like | Fast, low retention | Standard table tortillas, chips |
| Bob's Red Mill Golden | Commercial yellow flint | Medium-fine | Moderate, slow uptake | Thicker table tortillas, pupusas |
| Masienda Bolita | Oaxacan landrace yellow | Fine-stone ground | High, deep retention | Table tortillas, tlayudas |
| Masienda Blue Cónico | Highland landrace blue | Medium-stone ground | Very high, slow uptake | Table tortillas, quesadillas |
Choosing between commercial and heirloom varieties comes down to cost, shelf life, and aromatic depth. Industrial brands cost around three to four dollars for a two-kilogram bag, making them ideal for high-volume family cooking or weeknight meals. Heirloom flours often cost four to six times more per kilogram. However, the higher oil content in landrace corn keeps the finished tortillas softer for a longer window after cooking, whereas commercial flours dry into leather much faster if not handled correctly.
Hydration ratios by weight
Volume measurements will ruin your masa. Scooping dry flour with a measuring cup introduces density errors up to 25 percent depending on how settled the bag is. Use a digital kitchen scale and work strictly in metric ratios. Masa harina needs substantially more water by weight than standard wheat bread dough because the nixtamalized starches have already undergone partial gelatinization during the initial cooking and drying process.
A dependable starting ratio for commercial white masa harina is 1:1.25 by weight. For every 100 grams of dry masa flour, add 125 grams of water. For stone-ground heirloom varieties, push the initial ratio to 1:1.35, or 135 grams of water per 100 grams of dry flour. The water must be warm, ideally between 45 and 55 degrees Celsius. Hot water softens the starch granules immediately, allowing moisture to penetrate the interior cell walls of the ground corn fragments rather than sitting on the surface.
- Weigh 250 grams of masa harina into a wide stainless steel or ceramic mixing bowl.
- Add 3 grams of fine sea salt to the dry flour and whisk thoroughly to distribute.
- Pour in 315 grams of warm water (around 50 degrees Celsius) all at once.
- Knead with an open hand for three full minutes until a uniform, shaggy mass forms with no dry pockets at the bottom of the bowl.
- Cover the bowl tightly with a damp kitchen towel or plastic wrap and leave it undisturbed for 25 minutes.
That 25-minute bench rest is mandatory. During this rest, the coarse bits of corn endosperm drink the water held between the starch molecules. When you return to the dough, conduct the edge test. Pinch off a 35-gram piece of masa, roll it into a smooth ball between your palms, and press it flat with the base of your thumb. Examine the circumference of the disc. If the edges break into deep, jagged cracks, the dough is dry. Add warm water one tablespoon (15 grams) at a time, kneading for 60 seconds after each addition, until a pressed test ball yields clean, smooth margins with only minimal, micro-fracturing along the rim. If the dough sticks wetly to your palm, dust in one tablespoon of dry flour.
Tortilla press technique and plastic liners
A tortilla press does not cook the dough; it delivers rapid, level compression that a standard rolling pin cannot replicate without sticking. Cast-iron presses weighing between 3.5 and 4.5 kilograms provide the downward force needed for an even thinness. Lightweight aluminum presses flex under pressure, leaving tortillas thick on one side and paper-thin on the other. Heavy hardwood presses (mesquite or oak) work well, though they take up significantly more counter space.
Never place raw masa directly on the bare metal or wood plates. It will adhere immediately and tear when lifted. Parchment paper is a poor substitute because the high moisture in the dough weakens the paper fibers, causing it to buckle, wrinkle, and imprint creases onto the tortilla face. Wax paper transfers a microscopic film of paraffin to the wet masa under heat. The correct liner is flexible, heavy-gauge polyethylene.
- Cut open a heavy one-gallon plastic freezer storage bag down both side seams, leaving the bottom fold intact, or use two separate square pieces cut from a clean, smooth plastic grocery produce bag.
- Open the press and lay the bottom half of the plastic sheet flat over the base plate.
- Place a 35-gram to 40-gram ball of rested dough slightly off-center toward the hinge, not dead center. The lever applies mechanical advantage from the hinge outward, which pushes the dough forward toward the handle.
- Fold the top sheet of plastic over the dough ball.
- Bring the top plate down, engage the lever arm, and press down firmly until the plate stops. Do not jump or hang your full body weight on the handle, which can warp the metal hinge pins.
- Lift the handle, open the press, rotate the entire plastic sandwich 180 degrees, and close the press again for a gentle second press. This second compression evens out any thickness variations.
Peeling the raw tortilla requires deliberate hand mechanics. The disc should measure roughly 1.5 to 2 millimeters thick. If you pull the delicate dough sheet off the plastic, it will stretch, distort, and tear. Instead, peel the top plastic sheet away from the dough completely. Flip the tortilla onto your dominant palm, then slowly peel the bottom plastic sheet off the back of the dough. The tortilla is now resting flat across your fingers and palm, ready to slide onto the hot comal without folding over itself.
The three-flip griddle cycle
A tortilla puffs only when interior steam hits a rapid temperature rise between two sealed, cooked surfaces. If you flip the tortilla erratically, you destroy the structural skins needed to trap that steam. The griddle, preferably a heavy carbon steel comal or a seasoned cast-iron skillet, must sit at a surface temperature between 220 and 240 degrees Celsius. Use an infrared non-contact thermometer to confirm the reading. If the pan sits below 200 degrees Celsius, the dough dries out before it seals, turning into a stiff biscuit. If it sits above 260 degrees Celsius, the starch chars before the interior cooks through.
Maintain a completely dry cooking surface. Do not brush the pan with oil, lard, or butter. Fat fries the outer starch cells, making them crisp and porous, which lets steam escape through micro-vents rather than lifting the top layer. Lay the raw tortilla down using a smooth, rolling motion from the heel of your hand toward the fingertips to avoid trapping air bubbles beneath the dough.
- The initial seal (first side): Cook undisturbed for 15 to 20 seconds. The edges will dry slightly and turn from a wet sheen to a matte texture. Slide a thin metal spatula underneath, or use your fingertips to grip the edge. The tortilla should release cleanly without sticking. Flip it immediately.
- The structural bake (second side): Cook the second side for 35 to 50 seconds. This is the main cooking phase. The bottom will develop pale, light brown toasted freckles (pintas), and the interior starches will begin to heat rapidly. Flip back to the first side.
- The puff activation (first side again): Cook for another 20 to 30 seconds. Within 10 to 15 seconds of this third contact with the heat, the tortilla will begin to inflate. The steam locked between the two seared skins expands violently, separating the layers and ballooning the entire disc.
If the tortilla hesitates to inflate, give it a quick, light tap in the center with the flat blade of your spatula or the pads of your fingers. This mechanical tap forces the early steam pockets to merge into a single, dominant pocket that sweeps across the entire disc, pushing the upper skin outward into a dome. Remove the tortilla from the pan the moment it reaches full inflation. Leaving it on the iron longer bakes out the moisture reserves, guaranteeing a dry, brittle result once cool.
Steam storage to keep tortillas pliable
A tortilla straight off the griddle is crisp on its micro-surfaces and full of hot steam. If you place it uncovered on a flat plate, that steam escapes into the room, and the dry air hardens the outer crust within ninety seconds. If you place it inside a sealed plastic container while hot, the steam condenses into liquid water droplets on the plastic walls, falling back onto the edges to make them soggy and gummy.
The solution is controlled containment using a traditional woven basket (tortillero) lined with a thick, unwashed-linen or 100-percent cotton kitchen towel. Flour sack towels work best because their open weave breathes while retaining thermal mass. Place the freshly puffed tortilla directly inside the fold of the towel. Close the fabric over the top, then set the lid on the basket.
Inside the wrapped cloth, the tortilla undergoes a crucial sweat phase. The high-heat steam trapped in the center migrates slowly out through the seared crusts. Because the cloth absorbs excess surface moisture without trapping liquid droplets against the corn, the crust softens into a pliable, flexible skin. Each subsequent tortilla stacked on top contributes heat and moisture to the batch. The stack creates a unified thermal core that keeps the batch hot, tender, and rollable for up to 45 minutes.
To reheat cooled tortillas, avoid microwaves whenever possible. Microwaving agitates water molecules throughout the entire crumb simultaneously, causing the starches to turn rubbery and then rapidly crystallize into a rock-hard sheet as they cool. Instead, heat a dry comal to 200 degrees Celsius, pass the cold tortilla briefly under a running tap of cold water to wet both faces, and drop it onto the hot iron for 15 seconds per side. The surface water flashes into steam, instantly rehydrating the interior starches and returning the tortilla to its original soft state.
Common mistakes
- Using cold tap water: Cold water does not hydrate pre-cooked corn starches evenly. It leaves the dough stiff during kneading and soggy after resting. Always use water heated to at least 45 degrees Celsius.
- Rushing the hydration rest: Skipping the 25-minute bench rest guarantees cracked, split edges. The endosperm needs time to draw moisture into the core of each granule.
- Greasing the griddle: Adding oil or butter fries the exterior starch layer, making it rigid and porous. Tortillas need dry conduction heat to produce an airtight, flexible skin that inflates.
- Flipping too late on the first turn: Leaving the raw masa on the first side for more than 25 seconds creates an overly thick lower skin. That heavy crust prevents the tortilla from ballooning during the third step.
- Using parchment paper liners: Parchment absorbs water from the dough, wrinkles under the press lever, and leaves indentations that vent steam before the puff can occur. Use heavy freezer plastic instead.
Practical next steps
Set up your work area before mixing your next batch of masa. Clear a wide, level counter next to your range so you can move from the press to the comal in one continuous motion without pausing. Gather the necessary tools: a reliable digital scale, a 20-centimeter cast-iron tortilla press, a heavy-duty freezer bag cut down the seams, a dry cast-iron skillet or steel comal, and an infrared surface thermometer.
Mix a test batch using 250 grams of masa flour and 315 grams of warm water. Rest the dough for a full 25 minutes, test the hydration with the thumb-press technique, and dial in your stove burner until the griddle registers 230 degrees Celsius. Practice the three-flip rhythm on three tortillas, observing how the timing of that critical second flip sets up the final steam inflation.