 FlavorAtlas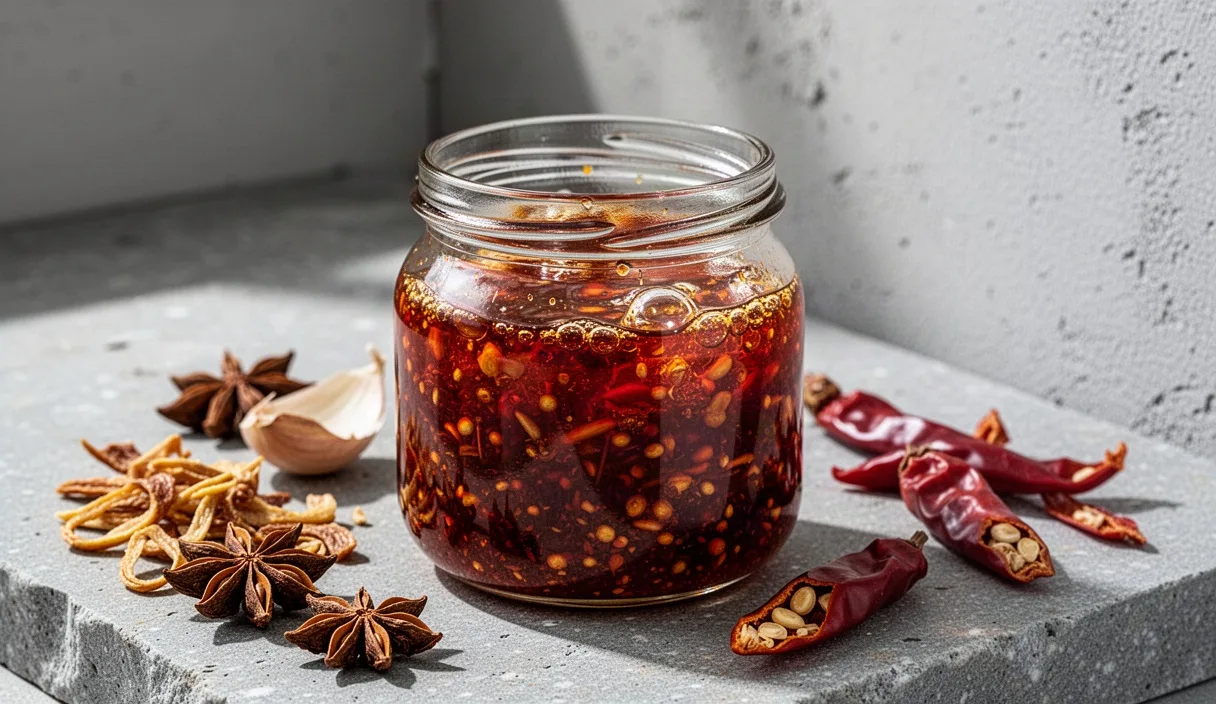
Chili crisp requires strict temperature control and a balanced chili blend. Commercial jars frequently lean on cheap palm oils, excessive sodium, and artificial extracts to simulate depth. Building a Sichuan chili crisp at home allows you to dictate the crunch density, adjust the capsaicin profile, and extract true roasted aromatics from whole pods rather than relying on stale factory powders.
Traditional Sichuan chili oil relies on semi-refined rapeseed oil and varied chili cultivars to balance tongue-numbing heat with savory complexity. This guide covers exact gram weights, oil temperatures, and moisture management protocols. Follow these ratios to build a batch yielding roughly 650 milliliters of finished crisp.
Selecting regional Sichuan chilies
Single-chili preparations fall flat because individual varieties emphasize either color, scent, or burn, but rarely all three. Authentic Sichuan crisp requires a blend of at least two, and ideally three, distinct dried cultivars. Sourcing whole, unblemished pods from an import grocer ensures the natural essential oils have not oxidized on a warehouse shelf.
Erjingtiao chilies serve as the backbone for fragrance and coloration. They register low to moderate capsaicin levels, offering sweet, smoky undertones and a rich crimson oil tint. Chao Tian Jiao, known as Facing Heaven chilies, supply direct, sharp heat that hits the back of the palate immediately. Denglong Jiao, or Lantern chilies, contribute a rounded fruitiness and bulk without escalating the heat, giving the crisp body and chew.
| Chili Variety | Heat Range (SHU) | Primary Role | Recommended Ratio |
|---|---|---|---|
| Erjingtiao | 15,000 - 20,000 | Aroma, sweetness, deep red color | 45% by weight |
| Chao Tian Jiao (Facing Heaven) | 30,000 - 50,000 | Direct heat, pungent sharpness | 35% by weight |
| Denglong Jiao (Lantern) | 2,000 - 5,000 | Smoky body, fruity notes | 20% by weight |
Process the pods manually to preserve texture. Snip stems with kitchen shears, shake out roughly 60% of the seeds to prevent bitter scorched notes, and drop the pods into a dry wok over low heat for 3 to 4 minutes. Toast them until brittle and fragrant, but stop before the skins darken past mahogany. Cool completely, then pulse in a spice grinder or pound in a mortar until the flakes measure between 2 mm and 4 mm. Fine powder burns on contact with hot oil; oversized fragments stay unpleasantly leathery.
Oil temperature benchmarks
Oil selection dictates base flavor. Authentic Sichuan recipes require virgin rapeseed oil, known locally as caizi you. This dark, amber oil has a distinct grassy, nutty profile that neutral vegetable or canola oils cannot duplicate. If caizi you is unavailable, use expeller-pressed peanut oil or high-oleic sunflower oil. Avoid olive oil, which oxidizes and clouds at high infusion heat.
Raw caizi you contains natural erucic compounds and raw plant compounds that taste acrid unless properly heated before infusion. Bring the raw oil to 220°C (428°F) in a deep pot. The oil will foam aggressively as residual moisture boils off. Turn off the flame once the surface clears and white smoke appears. Allow the oil to cool down to target operational ranges before introducing any spices or aromatics.
Never dump hot oil over your prepared chili mixture in a single pour. A single addition burns the dry flakes and turns the oil bitter. Use a three-pour technique controlled by an accurate digital probe thermometer:
- First pour at 180°C (356°F): Ladle one-third of the infused oil over the chili flakes, raw sesame seeds, and toasted Sichuan peppercorns. This initial heat activates the Maillard reaction, toasts the sesame seeds instantly, and extracts deep red carotenoid pigments from the chili skins without scorching the core flesh.
- Second pour at 150°C (302°F): Wait 3 to 5 minutes for the oil remaining in the pot to drop to 150°C. Pour the second third into the bowl. This intermediate temperature extracts body and capsaicin while avoiding thermal breakdown of delicate top notes.
- Final pour at 120°C (248°F): Allow the oil to cool further before adding the final third. This low-temperature bath locks in the volatile terpenes and herbal aromas of the chili blend. Stir gently with a stainless steel spoon for 60 seconds.
Aromatic infusion ratios
The cooking oil must be infused with hard spices and fresh alliums before it touches the chili bowl. This step builds the savory baseline that separates a complex crisp from a simple hot oil. For 500 ml of base oil, balance whole dried spices with water-heavy fresh aromatics.
Prepare the dried spices by cracking hard pods slightly to expose internal seeds. Black cardamom, cassia bark, and star anise provide foundational warm notes, while fennel seeds and cloves cut through rich fat. Measure your dry spices precisely to prevent bitter over-extraction:
- 1 piece cassia bark (approximately 5 grams; do not substitute soft Ceylon cinnamon)
- 3 whole star anise pods
- 2 pieces black cardamom (tsao-ko), cracked open with a knife flat
- 1 piece sand ginger (sha jiang), dried, lightly bruised
- 3 grams whole fennel seeds
- 2 whole cloves
- 2 dried bay leaves
- 15 grams whole red Sichuan peppercorns (Da Hong Pao variety)
Prepare fresh wet aromatics to extract water-soluble flavors into the oil during early heating. Thinly slice 40 grams of fresh ginger, roughly crush 3 medium shallots, and smash 4 scallion whites. Add both the dry spices and fresh aromatics into the cooled caizi you once it reaches 110°C (230°F).
Simmer the mixture gently between 110°C and 125°C (230°F to 257°F) for 25 to 30 minutes. The moisture in the fresh ginger and scallions will sizzle steadily. Watch the color of the scallions closely. The moment the scallion greens turn medium golden brown, lift all spices and fresh aromatics out of the pot with a stainless steel skimmer. Discard the spent solids. Reheat the clear, fragrant oil to 180°C to begin the three-pour chili infusion.
Crisping garlic and shallots
Garlic and shallot chips must be fried separately from the oil infusion. Adding raw garlic or shallots directly into the hot chili mash introduces trapped moisture, which leads to soggy solids and risks spoilage. Uniform thickness is non-negotiable; uneven slices burn at the edges while centers remain wet.
Slice peeled shallots and firm garlic cloves on a mandoline set to exactly 1.5 mm. Rinse the sliced garlic in cold running water for 60 seconds using a fine sieve. This rinses away surface allicin and free starches that cause sticking and premature scorching. Drain thoroughly, then press the slices firmly between layers of paper towels to pull out surface water.
Fry the alliums in batches using 200 ml of clean, neutral peanut oil, keeping them separate from the main infusion oil:
- Cold-start frying: Place the dried shallot slices into the cold or lukewarm oil (around 100°C / 212°F) in a wide saucepan. Bring the heat up slowly to 135°C (275°F). Stir constantly with a heat-resistant spatula to prevent clumping.
- Moisture evaporation: Maintain oil temperature between 130°C and 140°C. Water bubbles will vigorously surround each slice. As bubbling slows, watch the color shift from translucent to pale ivory.
- Early pull: Remove shallots when they turn pale straw-yellow, well before they turn deep brown. Carryover thermal momentum inside the allium sugars continues cooking the chips for 2 to 3 minutes after removal. Drain on paper towels in a single, unstacked layer.
- Garlic batch: Fry the washed garlic slices using the same method, keeping the oil at 130°C (266°F). Garlic turns bitter faster than shallots; pull the garlic slices the second they flash faint gold. Salt lightly immediately after pulling.
Allow the crisped chips to cool completely to ambient room temperature. They must snap cleanly when bent. If a chip bends without breaking, it retains internal moisture and must not be mixed into the finished oil. Fold the fully cooled, crispy alliums, along with 10 grams of mushroom powder, 6 grams of fine sea salt, and 4 grams of raw sugar, directly into the cooled chili-oil base.
Storage safety and shelf life
Botulism risk is the primary food safety concern with homemade chili crisp. Clostridium botulinum bacteria thrive in low-oxygen, low-acid, and moisture-rich environments. Pouring oil over garlic that still contains water creates conditions that allow bacterial spores to germinate and produce dangerous toxins. If you suspect moisture contamination or intend to store the crisp long-term, consult a certified food preservation specialist or follow tested agricultural extension protocols.
Industrial brands use chemical acidification via citric acid to drop product pH below 4.6, or dehydrate ingredients under industrial vacuums to keep water activity (aW) below 0.85. At home, your primary defense is complete dehydration through precise frying and strict sanitation.
Adhere to these benchmarks to store homemade chili crisp safely:
- Vessel sanitation: Use heat-sterilized, bone-dry glass canning jars with airtight rubber-lined lids. A single droplet of water inside a storage jar will encourage mold growth and shorten the shelf life to under 7 days.
- Ambient storage: A completely dry batch stored in a cool, dark cupboard at 18°C to 21°C (64°F to 70°F) retains crispness and flavor for 30 to 45 days. Keep out of direct sunlight to prevent UV-driven oil rancidity.
- Refrigeration: Storing the jar at 3°C to 4°C (37°F to 39°F) extends viability to 90 days. The oil will congeal, cloud, and thicken under refrigeration due to natural fats; allow the jar to rest on the counter for 20 minutes before serving to return the oil to liquid form.
- Serving protocol: Always use a clean, thoroughly dried metal or ceramic spoon. Never introduce spoons with food residue, condensation, or saliva into the jar.
Common mistakes
Avoid these frequent procedural errors to preserve batch quality:
- Over-processing the chilies: Using a high-speed blender produces dusty chili flour. Powder turns bitter, burns at standard pour temperatures, and turns the oil into gritty sludge instead of clean liquid with crisp flakes.
- Skipping the caizi you smoke point: Pouring unrefined rapeseed oil without the preliminary heat cycle to 220°C leaves a raw, cabbage-like taste in the final crisp.
- Frying wet Sichuan peppercorns: Dropping whole peppercorns into oil exceeding 140°C breaks down hydroxy-alpha-sanshool, the compound responsible for the signature numbing sensation (ma). Peppercorns should sit in the mixing bowl and steep via the hot oil pour, not fry in the pan.
- Premature blending of chips: Combining warm garlic chips with warm chili oil softens the chips permanently. Both elements must sit at room temperature before they are mixed.
Next steps for your pantry
Gather the three core chilies, unrefined rapeseed oil, and whole spices from an Asian market or specialty supplier. Inspect the pods to confirm they are flexible, deep red, and free of gray moisture spots.
Set up your workstation with an accurate probe thermometer, an infrared surface thermometer, a mandoline, and wide stainless steel heat-proof bowls before turning on the burner. Prepare and slice all ingredients prior to cooking. Dedicate 90 minutes to the process from raw chili toasting to final oil blending, then rest the assembled crisp at room temperature for 24 hours before the first taste to let the flavors marry.