 FlavorAtlas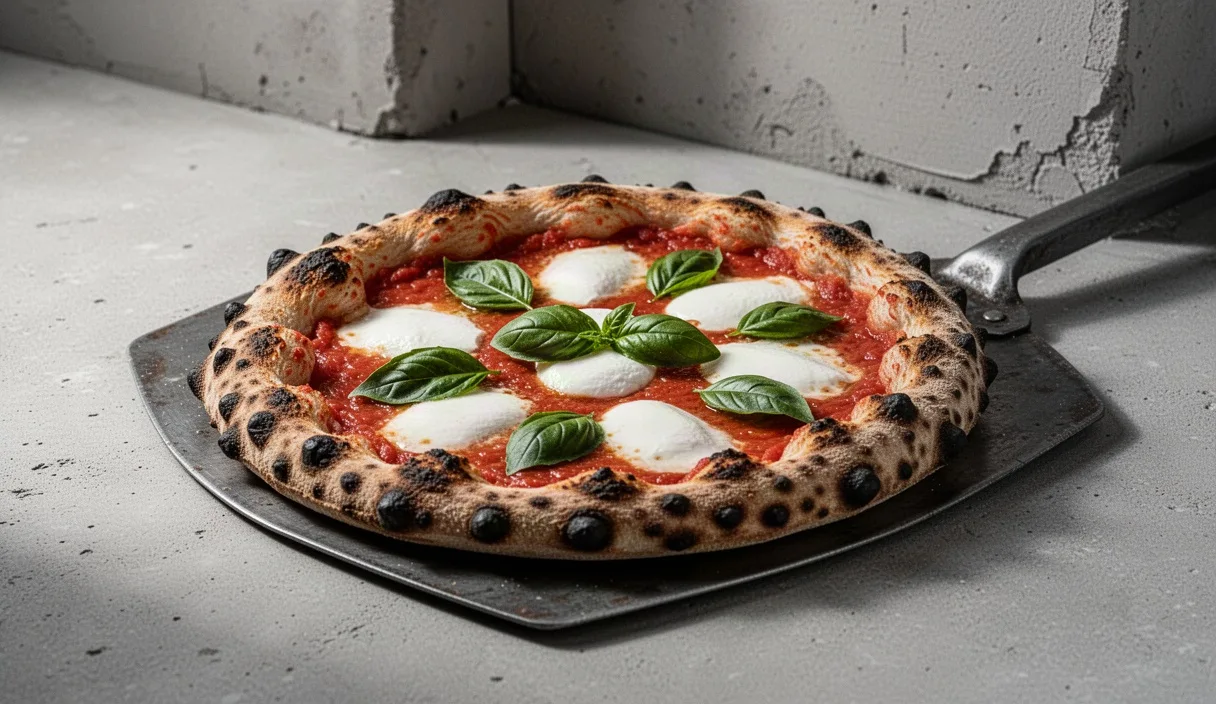
Standard home ovens tap out around 500 to 550 degrees Fahrenheit. Wood-fired Neapolitan ovens run past 900 degrees Fahrenheit, flash-baking a pie in 60 to 90 seconds. Trying to use a classic 60 percent Neapolitan dough formula in a standard domestic kitchen leaves you with a pale, dried-out cracker crust because the bake takes six to eight minutes instead of under two minutes.
Compensating for domestic heat limits requires adjusting dough hydration upward. Water acts as a heat conductor and keeps the crumb supple across an extended bake time. Balancing water levels between 65 percent and 72 percent allows home bakers to achieve leopard spotting, an open airy cornicione, and a tender interior without an expensive outdoor oven.
Flour protein and water hydration math
Flour choice dictates hydration limits. Genuine Neapolitan pizza relies on finely milled Italian Tipo 00 flour, typically ground from soft wheat with a protein content between 11.5 percent and 12.5 percent. Brands like Caputo Pizzeria are engineered for high-heat ovens and absorb less moisture, generally topping out comfortably around 62 percent to 64 percent hydration. When forced to hold 68 percent or higher water in a domestic setting, standard Tipo 00 breaks down, turning sticky and difficult to stretch.
For home bakes running past five minutes, switch to a high-protein bread flour or a reinforced Tipo 00 blend such as Caputo Cuoco (Chef's Flour), which sits at 13 percent protein. Higher gluten content forms a resilient network capable of locking in 67 percent to 71 percent water without tearing. The extra protein also speeds up the Maillard reaction, yielding better browning at lower temperatures.
| Flour Type | Protein Level | Optimal Home Hydration | Bake Time Window |
|---|---|---|---|
| Standard Tipo 00 (Caputo Pizzeria) | 12.2 percent | 62 percent to 64 percent | 7 to 9 minutes |
| Reinforced Tipo 00 (Caputo Cuoco) | 13.0 percent | 66 percent to 68 percent | 5 to 7 minutes |
| Commercial Bread Flour (King Arthur) | 12.7 percent | 67 percent to 70 percent | 5 to 6 minutes |
| High-Gluten Flour (All-Trumps type) | 14.2 percent | 70 percent to 73 percent | 4 to 6 minutes |
Calculate all ingredients as a ratio of total flour weight. For a batch of four 260-gram dough balls at 68 percent hydration, scale these exact amounts: 618 grams of strong flour, 420 grams of cool tap water, 17.3 grams of fine sea salt (2.8 percent), and 1.2 grams of instant dry yeast (roughly 0.2 percent). Salt strengthens the gluten strands while slowing yeast consumption, crucial for long fermentation schedules.
Autolyse and gentle hand kneading
High hydration doughs fail when worked aggressively upfront. Pour the full volume of water into a wide mixing bowl at roughly 65 degrees Fahrenheit. Dissolve the yeast completely, then stir in 90 percent of the flour until a shaggy, wet mass forms without dry pockets. Cover the bowl with a damp linen towel and let it rest undisturbed for 35 to 45 minutes.
This rest period starts the autolyse. Enzymatic activity breaks down starches into fermentable sugars while the wheat proteins hydrate naturally without physical shearing. Gluten matrixes begin forming on their own, drastically reducing manual labor later. Once the rest finishes, sprinkle the salt and the remaining flour evenly across the dough mass.
Work the dough inside the bowl using the slap-and-fold method rather than aggressive counter punching. Follow this sequence:
- Wet your hands with cold water to keep the wet dough from sticking to your skin.
- Reach under the far side of the dough mass, lift it upward until it stretches slightly, and fold it over its center toward you.
- Rotate the bowl 90 degrees and repeat the stretch-and-fold movement.
- Complete 24 to 28 rotations until the mass stiffens and holds a cohesive round shape.
- Rest the dough for 20 minutes under an inverted bowl to relax tension.
- Perform two sets of coil folds directly on the counter: lift the dough from the middle with both hands, let both ends tuck underneath, rotate 90 degrees, and repeat once.
Check gluten development using the windowpane test. Pinch a walnut-sized piece of dough and slowly pull it between your fingers in four directions. The dough should stretch thin enough to see light pass through the membrane without ripping. If it tears instantly, let it rest for 10 minutes and perform one final set of coil folds.
48-hour cold fermentation timeline
Fast room-temperature doughs lack the structural integrity needed to trap escaping steam during a fast domestic bake. A prolonged cold fermentation retards yeast production while enzymes slowly convert complex starches into simple sugars. These sugars are what blister and brown the crust under a home broiler. Aim for a cold window between 38 degrees and 41 degrees Fahrenheit in your refrigerator.
Timing the batch accurately determines oven spring:
- Bulk room ferment: Place the kneaded mass in an oiled plastic tub. Let it sit at room temperature (68 to 72 degrees Fahrenheit) for two hours until it expands roughly 25 percent in volume.
- Chill phase: Move the sealed tub into the coldest shelf of the refrigerator. Leave it untouched for 36 hours. Yeast will slow to a crawl, but the gluten network will relax and trap microscopic carbon dioxide pockets.
- Dividing and balling: Pull the bulk container out at hour 38. Divide into 260-gram portions using a bench scraper. Do not rip the dough apart with your hands.
- Shaping the dough balls: Pull the outer edges of each portion underneath itself to create a smooth, tight skin on the top. Pinch the bottom seam closed firmly on the counter surface to lock in air bubbles.
- Secondary cold rest: Place the balls into individual oiled round containers or a proofing box. Return them to the refrigerator for another 8 to 10 hours.
- Final counter proof: Pull the dough balls out 2 to 3 hours before lighting the oven. The internal temperature of the dough must reach 62 to 65 degrees Fahrenheit before stretching, otherwise it will snap back relentlessly during shaping.
Baking cold dough directly from the fridge produces dense gumlines just beneath the sauce layer. The dough must be fully relaxed and warm enough for the trapped carbon dioxide to expand rapidly the second it hits the hot cooking surface.
Steel pre-heating and broiling method
Ditch traditional cordierite pizza stones. Cordierite features low thermal conductivity, which works fine over 40 minutes of bread baking but fails during a quick pizza cook. Use a piece of carbon steel plate measuring at least 3/8-inch (9.5 millimeters) thick, ideally 1/2-inch thick. Steel conducts heat into the base of the dough roughly 18 times faster than ceramic stone, replicating the intense floor heat of an authentic brick oven.
Position the steel on the top oven rack, roughly 4 to 5 inches below your oven's upper broiling element. Turn your oven to its absolute maximum bake setting, usually 500 or 550 degrees Fahrenheit. Allow the steel to heat for a minimum of 55 minutes. Check the surface with an infrared thermometer: the center of the steel should read at least 525 degrees Fahrenheit before proceeding.
Switch the oven setting from bake to broiler (high) exactly 10 minutes before sliding the pizza onto the steel. This superheats the metal plate past 570 degrees Fahrenheit while blanketing the cooking zone with direct, downward infrared radiation.
Launch the stretched dough using a wooden or perforated aluminum peel dusted lightly with semolina flour rather than raw white flour. Semolina rolls like tiny ball bearings and does not scorch into bitter black ash as quickly as standard flour. Keep the broiler running on high throughout the entire bake. Rotate the pie 180 degrees at the 2.5-minute mark using an aluminum turning peel to balance out hot spots in the broiling element. Total bake time should run between 4 and 5 minutes.
Topping moisture control
High dough hydration combined with high moisture toppings leads to a soupy, undercooked center known as the swamp effect. Neapolitan home bakes require strictly managed liquids on the crust surface.
Whole, peeled canned San Marzano tomatoes remain the standard, but never use an electric blender to process them. Blenders shear the tomato seeds, releasing bitter compounds, and incorporate micro air bubbles that turn the sauce watery and pink. Crush whole tomatoes by hand through a stainless steel food mill or squeeze them thoroughly with clean fingers. Strain the crushed pulp through a fine mesh sieve for 20 minutes to eliminate free water. Season solely with 1.2 percent fine sea salt per weight of drained pulp; skip dried herbs or sugar.
Cheese management requires equal discipline. Fresh mozzarella packed in liquid water contains upwards of 55 percent free water. If placed straight onto a home pizza, it pools into liquid puddles that lower crust temperatures.
- Cut fresh fior di latte or mozzarella di bufala into strips roughly 1/4-inch thick.
- Layer the sliced cheese between four sheets of heavy paper towels in a flat colander.
- Weigh the cheese down with a small plate for at least two hours inside the refrigerator.
- Alternatively, source whole-milk, low-moisture mozzarella blocks and hand-shred them on the coarse holes of a box grater.
- Keep total cheese weight to a strict maximum of 75 to 85 grams per 12-inch pizza.
Finish with extra virgin olive oil only after baking, or limit pre-bake oil to a razor-thin spiral totaling less than 5 grams. Excess oil acts as a heat shield on raw dough, preventing the crust from venting steam rapidly during the crucial initial 90 seconds of contact with the steel.
Common mistakes
Over-hydrating flour beyond its protein limit is the primary mistake home bakers make. Pushing an all-purpose flour to 72 percent water creates a batter-like slurry that will not support oven spring. Stay at 65 percent until your shaping technique can handle stickier textures.
Using excess flour on the shaping board ruins the bottom crust. When high-hydration dough sticks to hands, the temptation is to toss generous cups of flour across the marble slab. Raw flour clings to the damp dough, burns black on the steel plate within two minutes, and tastes intensely bitter. Use coarse semolina or rimacinata flour sparingly, shaking off excess before loading the peel.
Opening the oven door repeatedly bleeds ambient heat instantly. An open door drops internal domestic oven air temperatures by 75 to 100 degrees within 15 seconds. Keep the door closed until you must rotate the crust halfway through the bake.
Practical next steps
Start your dough cycle on Thursday night if you plan to bake on Saturday evening. Mix your baseline batch using 67 percent hydration, utilizing a reliable kitchen scale with 0.1-gram precision. Calibrate your oven setup by checking the top rack height: measure the clearance so the pizza sits precisely 4.5 inches below the heating coil.
Track your room temperatures throughout the fermentation process. If your kitchen ambient temperature runs higher than 74 degrees Fahrenheit, shorten the initial bulk rest to 75 minutes to prevent premature yeast exhaustion. Log your bake times, floor temperatures, and hydration ratios in a kitchen notebook after every session to zero in on the precise hydration percentage your specific home oven handles best.